
WordPress is a widely used content management system that powers millions of websites. Security is crucial for the owners running WordPress sites as a breached site can seriously compromise its users and damage their brand’s identity. This blog post looks at some essential WordPress security requirements and hardening methods without requiring a third-party plugin to help secure your next WordPress instance.
Credentials: Disabling the defaults and password strength
Previously, the default WordPress admin username was “admin, ” making it simple for threat actors to conduct brute-force attacks. WordPress has since changed this and allows users to customize the username and password during installation.
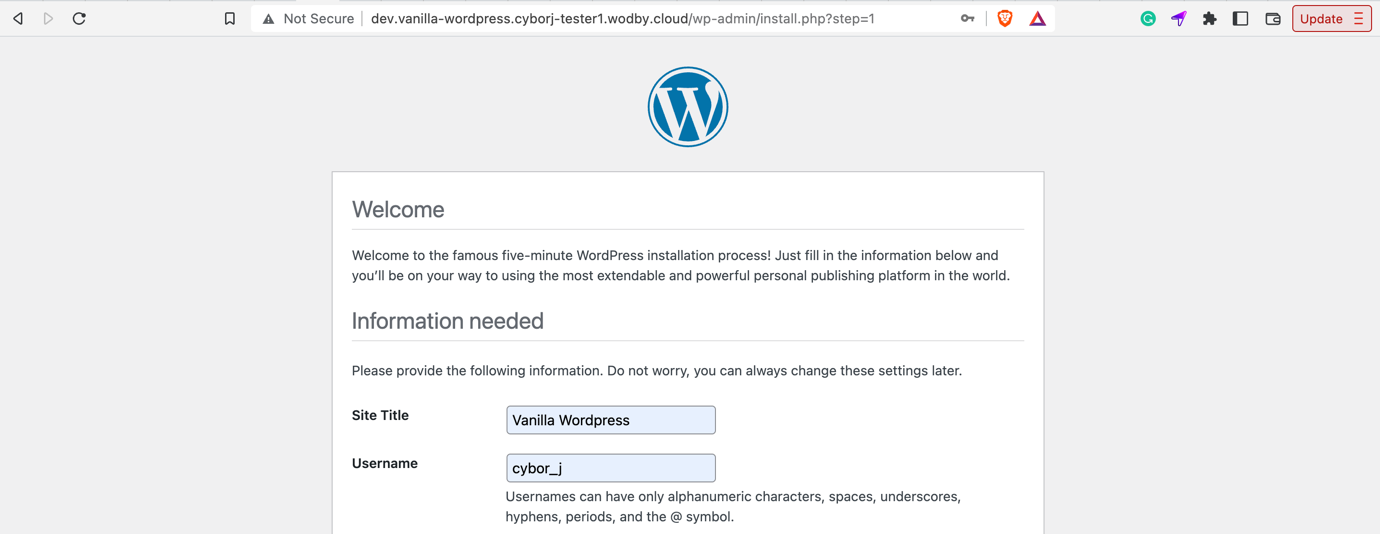
How to customize admin credentials
While installing WordPress, select the unique username instead of the default one (admin, administrator, admin1, etc.):
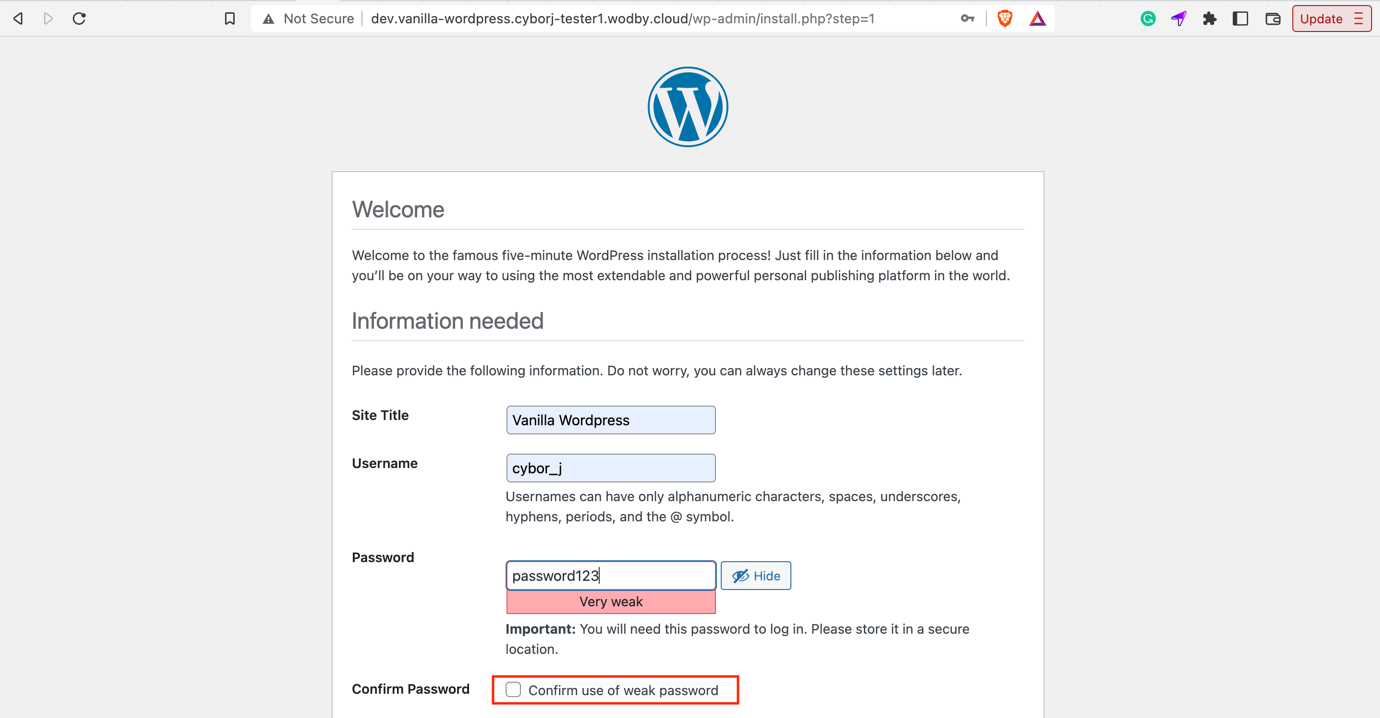
WordPress allows the setup of a weak password by confirming an additional option: “Confirm use of a weak password.”:
However, of course, it’s crucial to pick a strong one:

Keeping your WordPress version up-to-date
WordPress is open-source software and requires frequent updates. Minor updates will be automatically downloaded and installed by default; however, essential updates must be manually installed.
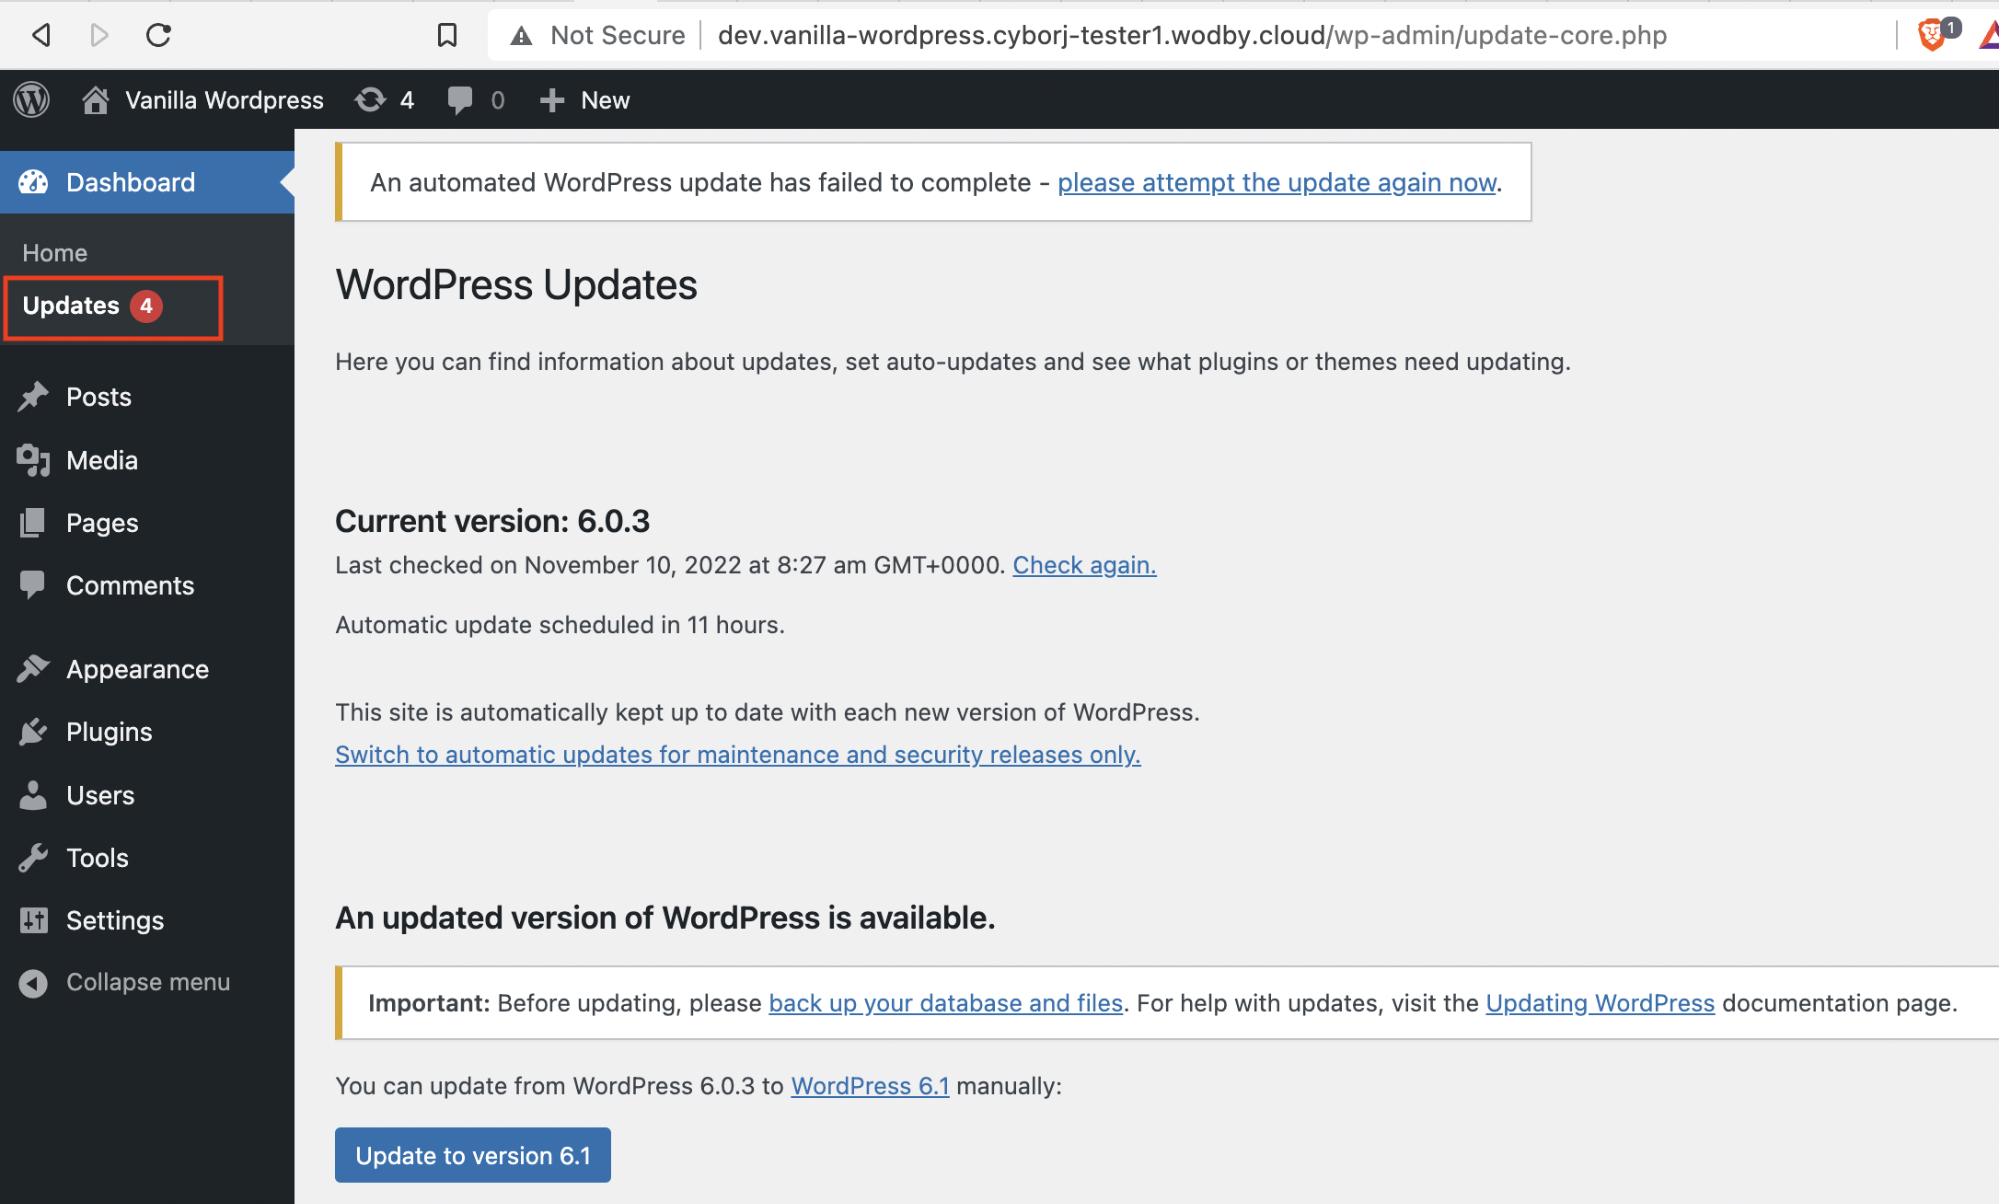
How to check for updates:
- Log in to your WordPress instance.
- Navigate to “Updates” under the dashboard section.
- If there are updates available, you will see a highlight as shown below:
- You can update to the latest version by clicking the `Update to version x.x` button.
Updating plugins and themes
WordPress has a marketplace with thousands of add-ons, including plugins and themes that can be added to support additional functionality. Outdated add-ons may introduce security vulnerabilities to your instance. The option to update installed add-ons with the latest patch is available on the same page as the WordPress version.
How to update add-ons
- Log in to your WordPress instance.
- Navigate to “Updates” under the dashboard section.
- If there are updates available, they will be listed here as shown below:

Disabling XML-RPC
XML-RPC is a core WordPress API that enables XML and HTTPS communication between programs and WordPress websites. It uses HTTP as the transport and XML as the encoding to call a remote procedure. The XML-RPC protocol is straightforward and can send, process, and return complex data structures.
By default, it is available on the /xmlrpc.php path on the WordPress instance and, when accessed, returns the following response:

Security risks with XML-RPC can lead to severe Cross-Site Port Attacks (XSPAs), Server-Side Request Forgery, Credential Bruteforcing, and Denial of Service. Disabling XML-RPC will block attackers from using this possible entry point to gain access to your site or use your site as part of a DDoS attack on another site. You can allow remote access for you and your team while restricting everyone else by disabling all XML-RPC requests before they are passed on to WordPress.
How to disable XML-RPC
- Navigate to your website’s file manager and open the .htaccess file
- Add the following code to the file:
# Block WordPress xmlrpc.php requests
 <Files xmlrpc.php>
 order deny, allow
 deny from all
 allow from xxx.xxx.xxx.xxx
 </Files>
- Replace xxx.xxx.xxx.xxx with the IP address you want to grant access to xmlrpc.php. If you’re going to disable access altogether, simply remove this line.
Disabling file editing
The built-in code editor of WordPress allows you to change the WordPress theme and plugin files from the administration area. Theme and plugin editors were improved in WordPress 4.9 to prevent users from accidentally breaking their websites. The primary drawback of the file editor is that it gives you full authority to add any code to your website. If hackers gain access to your WordPress admin area, they can use the built-in editor to access your WordPress data. It is recommended to disable file editing to improve WordPress security.
How to disable file editing
- Navigate to your wp-config.php file and open it in a code editor.
- Add define(‘DISALLOW_FILE_EDIT’, true ); to the bottom of your code.
- Save the changes and upload the file back to the website.
Disabling PHP file execution in upload directories
Specific directories are made writeable by default so that you and other authorized users of your website can add themes, plugins, photos, and videos.
Attackers can abuse this function to upload malicious backdoor files that pose as essential WordPress files. These files can run in the background and have complete access to every component of your website because they are primarily built in PHP. You can create a .htaccess file to use in any WordPress installation directory to disable PHP execution; by default, it resides in the root folder of your website.
How to disable PHP execution using the .htaccess file
- Open a notepad or code editor.
- Copy and paste the following code and save the file using extension .htaccess:
<Files *.php>
deny from all
<Files>
- Upload this file to the /wp-includes/ and /wp-content/uploads/ folders on your WordPress server.
Protecting WordPress Administrator area by filtering IP addresses
Limiting wp-admin access to your team’s IP addresses is an intelligent solution if a few trusted individuals need access to the admin area. Your team members will access the site from their respective locations with their unique IP addresses. If you disable connections from outside IP addresses, even if an attacker obtains your username and password, they will be unable to access your website.
How to limit access to the admin area
- Make a list of IP addresses that need access to the admin area.
- Navigate to the .htaccess file and add the following code:
AuthUserFile /dev/null
AuthGroupFile /dev/null
AuthName "WordPress Admin Area"
AuthType Basic
<LIMIT GET>
order deny,allow
deny from all
# whitelist John's IP address
allow from xx.xx.xx.xxx
# whitelist Jenny's IP address
allow from xx.xx.xx.xxx
</LIMIT>
Disabling trackbacks and pingbacks
When someone’s content is used in another blog, a pingback feature notifies them.
An attacker can use the pingback feature to perform a Distributed Denial of Service (DDoS) attack. While this doesn’t directly affect your server, it does allow attackers to utilize it to escalate their attacks, which could impact how well your site functions. WordPress will enable you to disable pingbacks on a website.
How to disable pingbacks
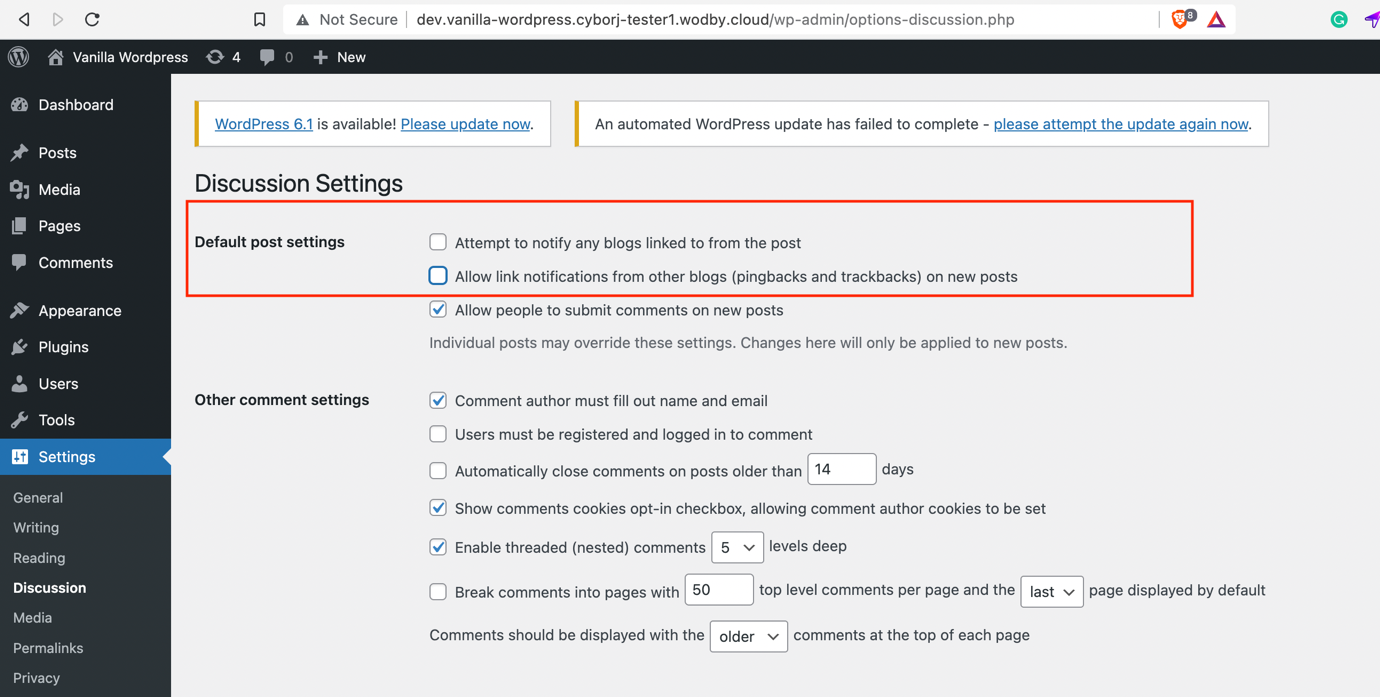
- Navigate to the settings of your dashboard.
- Go to Settings > Discussion Settings
- Uncheck the options highlighted below to disable pingbacks:
How to disable self-pings
Self-pings can only be disabled manually by writing code snippets to your theme files. Copy and paste the following code into your theme’s function.php file or any code-specific plugin.
function no_self_ping( &$links ) {
  $home = get_option( 'home' );
  foreach ( $links as $l => $link )
   if ( 0 === strpos( $link, $home ) )
    unset($links[$l]);
}
add_action( 'pre_ping', 'no_self_ping' );
Disabling wp-cron
The wp-cron scheduling system is integral to any WordPress website. Time-sensitive operations like checking for updates, publishing scheduled posts, automatically making frequent backups, and sending triggered emails are all managed by this system.
How to disable the wp-cron endpoint
- Navigate to the cored WordPress configuration file, i.e., wp-config.php.
- Add define(‘DISABLE_WP_CRON’, true); to the bottom of your code.
- Save the file and upload it back to your website manager.
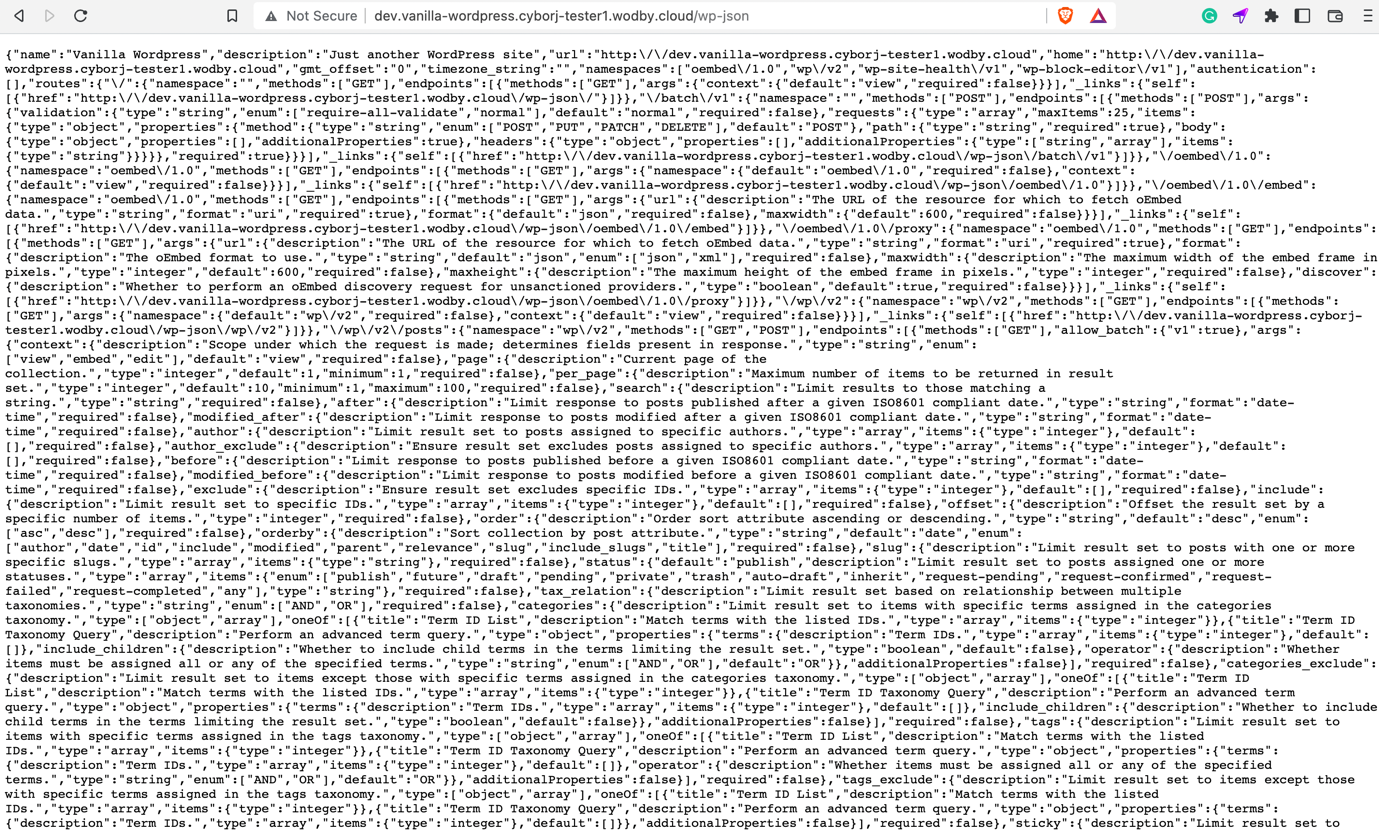
Disabling wp-json
There is no doubt that the JSON REST API offers WordPress developers several advantages, such as making obtaining data with GET queries simple. However, this could expose your website to DDoS attacks or disclose sensitive information. It is also resource-intensive, causing your WordPress website to slow down.
How to disable wp-json
Add the following code to your functions.php file and save it.
<?php
 add_filter( 'rest_authentication_errors', 'wp_snippet_disable_rest_api' );
   function wp_snippet_disable_rest_api( $access ) {
      return new WP_Error( 'rest_disabled', __('The WordPress REST API has been disabled.'), array( 'status' => rest_authorization_required_code()));
   }
?>
You can disable other sensitive directories with the help of the “Disable REST API” plugin under the Settings section:

Conclusion
These are a few mitigation and hardening techniques to configure your WordPress instance securely to prevent common attacks. It’s important to note that these techniques alone are ineffective if the web server hosting your WordPress instance is not secure and hardened with the latest security patches. You may read more about web server hardening here: https://www.wpwhitesecurity.com/web-server-hardening/
Pingback: Hardening the web server of your WordPress website - WPSec
Pingback: Is WordPress Secure? - WPSec
Pingback: Your WordPress Vulnerability Scan Came Back Clean. Are You Still Exposed? - WPSec